Ever wondered how those jaw-dropping creatures from your favorite sci-fi or horror films are brought to life? Well, it’s not magic; it’s the art of Special Effects Makeup, where masterful creature design meets hands-on technique using materials like latex, silicone and detailed prosthetics.
Behind every snarling beast, ancient alien, or mythical monster is a skilled SFX artist who knows how to fuse creativity with material science. Dreaming of designing creatures that look like they walked straight off a movie set?
Let’s pull back the curtain on creature creation and show you how it’s done.
Crafting Creatures: Transforming Concepts into Reality
Creating a believable creature isn’t just about wild imagination, it’s about bringing it to life with physical and digital artistry.
In the makeup and film industry, creature design involves a fusion of sculpting, painting, prosthetics application and, increasingly, digital enhancement. And the secret weapons? Latex, silicone and prosthetics.
These materials offer the flexibility, texture and realism required to transform actors into otherworldly beings – whether for big-screen blockbusters, haunted attractions, or gaming promos.
But how exactly do you go from idea to full-blown beast?
Check Out: How to Create Realistic Wounds and Scars with Prosthetics?
How to Design a Creature Using Latex, Silicone & Prosthetics?
Step 1: Creature Concept & Design Sketch
Before you touch any material, you need a concept. Start with rough sketches of your creature. Think about:
- Backstory: Where does it live? What does it eat? What’s its purpose?
- Anatomy: Is it humanoid? Insect-like? Hybrid?
- Silhouette: Strong shapes help make creatures memorable.
This is your blueprint. Most makeup artists start digitally with tools like Photoshop or Procreate to refine ideas quickly.
Step 2: Sculpting the Creature Maquette
Once the concept is approved, it’s time to sculpt a creature maquette – a scale model that brings your 2D concept into 3D form.
Materials & Tools:
- Chavant NSP clay for sculpting
- Wire armature for structure
- Loop tools and rakes for shaping
This is where you build the form, define muscles and add textures like scales, skin folds, horns, etc.
Tips:
- Focus on dynamic poses
- Balance realism with creativity
- Studied animal anatomy for reference
Step 3: Mold Making & Casting
Now that the sculpture is complete, you’ll create a mold around it – this is how your final latex or silicone pieces will be shaped.
For Latex:
- Mold is made with plaster or stone
- Liquid latex is poured in, slushed and left to dry
- Ideal for flexible, lightweight masks or skin
For Silicone:
- Use platinum-cure silicone for realistic skin texture
- Requires precise mixing and professional-grade molds
- Results in durable, flesh-like prosthetics
Comparison Tip:
- Latex = lightweight, budget-friendly, great for big builds
- Silicone = hyper-realistic, skin-like and great for close-up shots
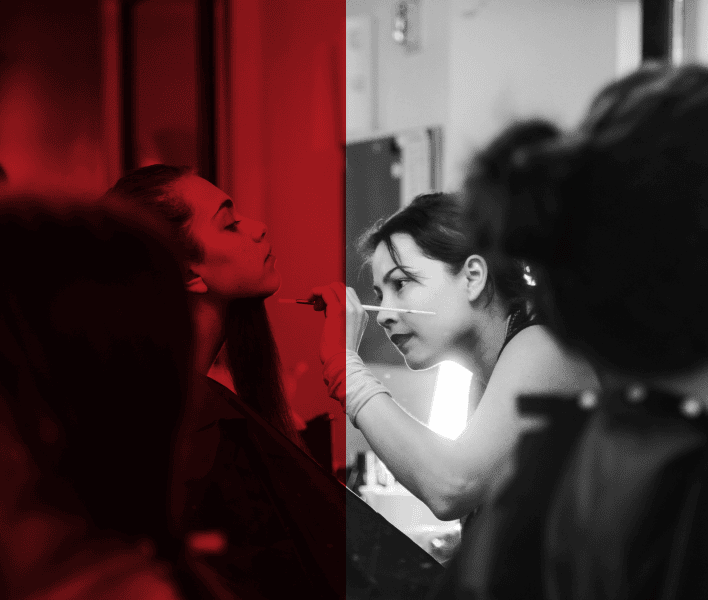
Step 4: Prosthetic Application
This is where the creature comes to life on the actor.
Steps:
- Clean and prep the actor’s skin
- Apply adhesives (like Pros-Aide or Telesis)
- Blending edges using alcohol or blending tools
- Paint using PAX paints, alcohol-based colors, or airbrush
- Add final textures, blood, dirt, or shine
Silicone prosthetics feel real and move with the actor’s expressions, while latex pieces are more suited for larger costume sections.
Step 5: Final Touches & Camera-Ready Finish
Once the prosthetic is applied:
- Improve your creation with hair punching, add detailed veining, or achieve a glossy finish using glycerin.
- Use contacts and dentures for realism
- Test under lights and camera to ensure everything reads well
Why Latex, Silicone and Prosthetics?
- Latex Creature Builds: Liquid latex is flexible, lightweight and ideal for creating skin textures, wounds, or adding layered detail to your character. It’s a go-to for fantasy creatures that require stretch and movement.
- Silicone-Based Creatures: Silicone offers a more skin-like, translucent finish. It’s heavier, more durable and perfect for creating realistic, fleshy appearances – think aliens or mutated humans with intricate facial structures.
- Prosthetics: These are the game-changers. Prosthetics help modify the actor’s appearance – elongate noses, change cheekbones, add horns or gills, while keeping the look believable on camera.
Together, these elements make creature characters not only visually powerful but also performance-ready.
Want to see the creature design process in action? Watch the full tutorial on YouTube –
https://www.youtube.com/watch?v=MoCaTql1FoE
Where to Learn the Art of Creature Design?
If this creative journey excites you, then professional training is your next step. Cinema Makeup School, which is part of the broader educational institution known as Cinema Art College Corporation, offers one of the most immersive and industry-relevant programs in Special Effects Makeup – Creature Concept Design Program.
This three-week intensive (120 clock hours) combines both digital and physical creature design, giving students a full-spectrum experience from concept art to sculpted maquettes.
Here’s a breakdown of the key learning outcomes from this program:
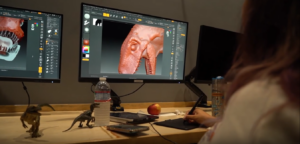
1. Digital FX Makeup
In this track, students learn how to design a creature concept that looks camera-ready. The program covers topics such as photo retouching, concept art development and using tools like Photoshop while working with a Wacom tablet to bring the ideas to life.
Skills and techniques covered:
- Working with a Wacom drawing tablet
- Photoshop portrait retouching
- Concept art development and quick turnaround concept creation
- Collaging layers and overlaying textures
- Image manipulation and recoloring
- Photo manipulation and more
2. Creature Maquette Sculpting
Bring your creature to life! This part of the program introduces clay sculpting and armature building, teaching you how to physically model your concept.
Core skills developed in this track include:
- Concept artistry and constructing an armature
- Working with Chavant NSP clay
- Sculpting anatomical details
- Adding creature features like scales, horns and other unique traits
- Stylizing hair, layering clothing and adding texture
- Building expressive, dynamic poses

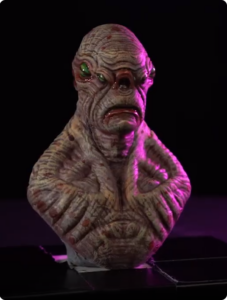
3. ZBrush Digital Design
Take your physical sculpting into the digital space. With ZBrush, students learn to digitally sculpt detailed busts of characters, complete with accessories, hair and textured finishes.
Skills built in this track include:
- Digital sculpting using a Wacom tablet
- Mastering ZBrush tools and subtools
- Working with geometry and mesh control
- Polypainting techniques for adding color and detail
- Hair brushing and refining fine features
- Surface finishing for professional-grade digital models
Get Inspired with More Reads:
How Cinema Makeup School’s Bootcamps and Workshops Empower You to Master SFX Makeup?
How Hard Is It to Learn Airbrushing?
SFX vs Prosthetic Makeup: What is the Difference?
Sculpt the Unseen, Design the Unbelievable!
Creature design is where imagination meets precision – an exhilarating mix of storytelling, sculpting, digital artistry and prosthetic magic. If you’re dreaming up a terrifying alien or a mythical beast, understanding the materials and techniques behind latex, silicone and prosthetics is key to turning those visions into reality.
With the right training, tools and creative mindset, you can step into special effects makeup and begin crafting creatures that captivate, terrify and inspire. The journey from sketch to screen begins with one decision: to start.