Are you ready to advance your special effects makeup skills?
Whether you’re preparing for a film set, a Halloween costume or a theatrical production, knowing how to create prosthetic wounds and scars will elevate your makeup artistry to a whole new level.
In this guide, we’ll walk you through the process of creating realistic prosthetic wounds and scars, using techniques that range from fake skin makeup to detailed burn scar prosthetics.
By the end, you’ll have the skills and confidence to create stunning prosthetic designs!
What Are Prosthetic Wounds and Scars?
Before we dive into the guide to creating prosthetic scars and wounds, let’s clarify what they are. Prosthetic wounds and scars are 3D makeup effects designed to mimic the appearance of injuries, burns, cuts, or old scars.
These prosthetics are typically made from materials like latex, silicone, or foam and they allow makeup artists to create lifelike effects that look extremely realistic on the skin.

Materials You Will Need for Prosthetic Wounds and Scars
To create high-quality prosthetic wounds and scars, you’ll need a range of specialized materials. Here’s a list of essentials:
- Liquid Latex or Silicone: Ideal for building skin textures and layering for realism.
- Gelatin or 3D Transfer Material: Great for creating flexible and lifelike wounds.
- Fake Blood: Choose between coagulated blood, stage blood and fresh blood for different effects.
- Prosthetic Adhesive (Pros-Aide): Ensures your prosthetics stay in place.
- Alcohol-Activated Paints: Perfect for adding realistic skin tones and depth.
- Sealer and Powder: To mattify and set your prosthetics for long wear.
- Molding Tools and Brushes: For sculpting and blending fine details.
Pro Tip: Prosthetic makeup requires more than just materials – it’s about technique, creativity and the right tools! Check out this video for a full breakdown:
https://www.youtube.com/watch?v=eK8Wi-f3vwU
How to Make Prosthetic Wounds?
1. Sculpt and Mold the Wound Design
Begin by sculpting your desired wound shape using clay or modeling wax. Depending on the type of wound – cuts, burns, lacerations, or even stab wounds, you’ll want to adjust your sculpting techniques accordingly.
Use fine sculpting tools to create the intricate details that will make your wound come alive. Pay special attention to creating depth, jagged edges and irregularities in texture, as real wounds often have uneven and rough surfaces.
Tip: Reference real wounds for accuracy. Look at images of cuts, bruises and scabs to capture the natural texture and irregularities.
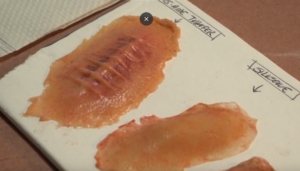
2. Create the Mold and Cast
Once your sculpture is complete, it’s time to create a mold. This mold will be used to form the prosthetic material. Depending on your material choice, use silicone or plaster to make a mold of the sculpted wound.
After the mold has set, you can cast the prosthetic using materials like gelatin, latex, or silicone. Choose the casting material based on the desired finish:
- Gelatin: Soft, flexible and perfect for body wounds that need movement.
- Latex: Traditional and affordable, good for flexible, durable prosthetics.
- Silicone: Offers the most realistic and durable look, especially for close-up shots.
Pro Tip: Use silicone for high-definition prosthetics, particularly for close-up shots where every detail will be visible. Gelatin works well for more flexible prosthetics, such as wounds that will move with the skin.
These silicone heads look unbelievably real – see for yourself!
https://www.youtube.com/watch?v=JfOeVvz5cRQ
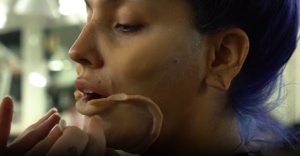
3. Apply the Prosthetic to the Skin
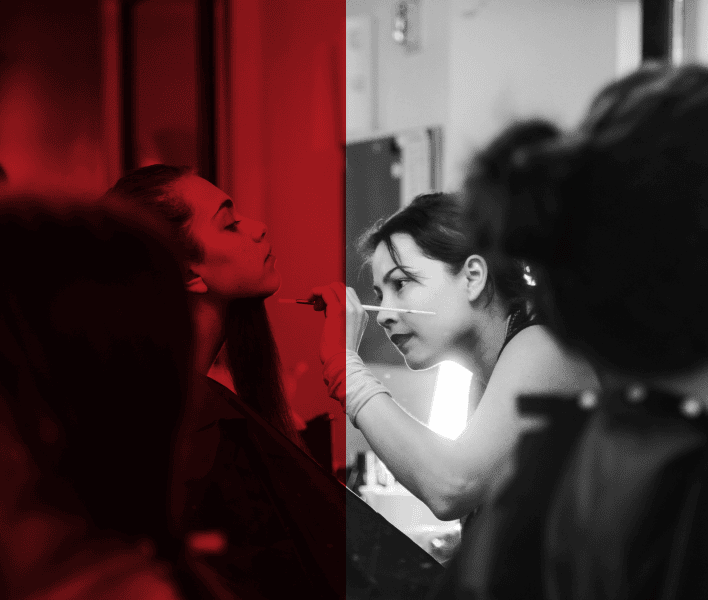
After the prosthetic is cast, it’s time to apply it to the skin. Begin by cleaning the skin thoroughly to remove any oils or dirt. This will ensure the prosthetic adheres properly.
Use a professional-grade adhesive like Pros-Aide to secure the prosthetic to the skin.
Once in place, carefully blend the edges of the prosthetic using latex or a sealer to create a smooth transition between the prosthetic and the skin.
Hack: For a more organic look, use a stipple sponge to texture the edges. This helps the prosthetic blend naturally into the skin, avoiding harsh lines.
4. Paint and Detail the Wound
To finish the prosthetic, you’ll need to paint and detail the wound. Use a combination of foundation, alcohol-based paints, or water-based makeup to match the color of the prosthetic to your skin tone.
For prosthetic wounds, focus on creating depth and realism by layering different colors: red for fresh blood, purple and blue for bruising, yellow for healing and black or dark brown for dried blood or necrosis. The more layers of color you add, the more realistic the wound will look.
Pro Tip: Add texture by using a fine sponge or stippling brush to create the appearance of torn skin or rough surfaces.
Prosthetic Wounds for Different Effects
- Burn Scar Prosthetics
Burn scars require attention to detail. Use silicone or gelatin to create a melted, uneven texture. Add shades of deep red, brown and black to enhance the charred look.
- Lacerations and Deep Cuts
Lacerations need jagged, irregular edges. Apply gelatin-based prosthetics for flexible movement and a natural look. Add layers of coagulated blood to mimic clotting.
- Bullet Holes and Entry Wounds
For gunshot wounds, create a concave prosthetic with clean, precise edges. Add singed tissue effects around the wound for realism.
Enroll Here to Learn Character Makeup for TV and Movies!
How to Make Prosthetic Scars for Film and TV?
Prosthetic scars are often used to show past injuries, character backstories, or to add dramatic effects to a scene. Creating realistic scars involves both sculpting and painting techniques. Follow this guide to make scars that will stand up to the scrutiny of film and TV production.
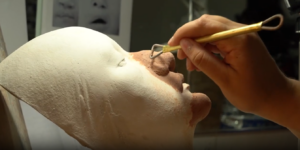
1. Design and Sculpt the Scar
Start by deciding what kind of scar you want to create. Is it a raised scar (keloid), a recessed scar (depressed or sunken), or an old, healed scar with irregularities?
Sculpt the scar design using wax or silicone. To create a raised scar, you can build up layers of wax or silicone to add volume, giving it a thick, bumpy appearance. For recessed scars, sculpt the area lower than the surrounding skin to create the illusion of a healed wound.
Tip: Be mindful of the direction of the scar, as real scars often follow the natural lines of the skin. For instance, facial scars may curve with the contours of the face.

2. Cast and Apply the Scar
Once you’ve sculpted your scar, cast it using silicone or latex, depending on the look you’re going for. Silicone is best for a realistic, high-definition look, especially when working with smaller, delicate scars.
Apply the cast prosthetic to the skin using a strong adhesive like Pros-Aide, ensuring it’s firmly in place.
Pro Tip: To make the prosthetic blend seamlessly with the skin, use a thin layer of pros-aide adhesive around the edges and press the scar gently into the skin.
3. Blend the Edges
To ensure the scar blends perfectly into the skin, it’s essential to blend the edges carefully. You can use a little bit of latex or silicone to help the edges dissolve into the surrounding skin.
A fine brush or a stipple sponge is ideal for gently blending out the edges, making the scar look like it’s part of the skin, rather than sitting on top of it.
Hack: If you’re working with a raised scar, use a stipple sponge around the edges to soften and texturize them for a more natural transition.
4. Add Color and Texture
The final step in creating a prosthetic scar is adding color and texture. Scars vary in color depending on how old they are, so think about the kind of scar you want to create.
Fresh scars may appear red or pink, while older scars might be more neutral, with shades of brown or gray. Use alcohol-activated paints or regular makeup to color the scar, focusing on blending the color seamlessly with the surrounding skin.
Pro Tip: For a truly realistic scar, apply different layers of colors to mimic the way real scars change over time. For instance, red for irritation, purple for healing and brown or gray for older, more faded scars.
Prosthetic Scars for Different Effects
1. Keloid Scars
Keloid scars are thick, raised and can be extremely disfiguring. They often form after a severe injury, surgery, or burn. These scars can add a dramatic, realistic touch to your makeup, especially in historical or fantasy characters.
2. Hypertrophic Scars
Hypertrophic scars are similar to keloid scars but are typically less raised and more confined to the boundaries of the injury. These scars are often red, thick and sometimes tender to the touch.
3. Stretch Marks (Atrophic Scars)
Stretch marks, or atrophic scars, are thin, indented lines often found on the skin after rapid growth or stretching, such as during pregnancy or weight gain.
4. Self-Harm Scars
Self-harm scars can range from thin, barely noticeable lines to thicker, raised scars, depending on the injury and healing process. Creating these scars requires precision to reflect the trauma realistically.
5. Surgical Scars
Surgical scars are often neat and linear but can still show signs of significant healing and trauma. These scars typically appear after medical procedures like stitches or incisions.
6. Cigarette Burns and Other Small Scars
Cigarette burns are small, round and often have a distinct, pitted look that’s perfect for creating a distressed or tortured appearance.
Check Out: Top 5 Tips for Beginner Makeup Artists
Common Mistakes to Avoid When Making Prosthetic Wounds and Scars
- Wrong Materials: Use silicone for flexibility and gelatin for simpler designs.
- Over-Sculpting: Keep details natural and avoid overcomplicating the design.
- Poor Blending: Blend edges smoothly using a stippling sponge and match skin tone.
- Too Much or Too Little Blood: Use coagulated blood for deep wounds and runny blood for fresh cuts.
- Ignoring Movement: Choose flexible materials like silicone for movable areas.
- Wrong Adhesive: Use professional prosthetic adhesive like Pros-Aide for secure attachment.
- Not Prepping Skin: Clean the skin with alcohol or soap and water before applying prosthetics.
- Lighting & Camera: Test prosthetics under different lighting to ensure realism on camera.
- Rushing Drying Time: Allow each layer to dry completely before adding another.
Become a Prosthetics Pro with Expert Training!
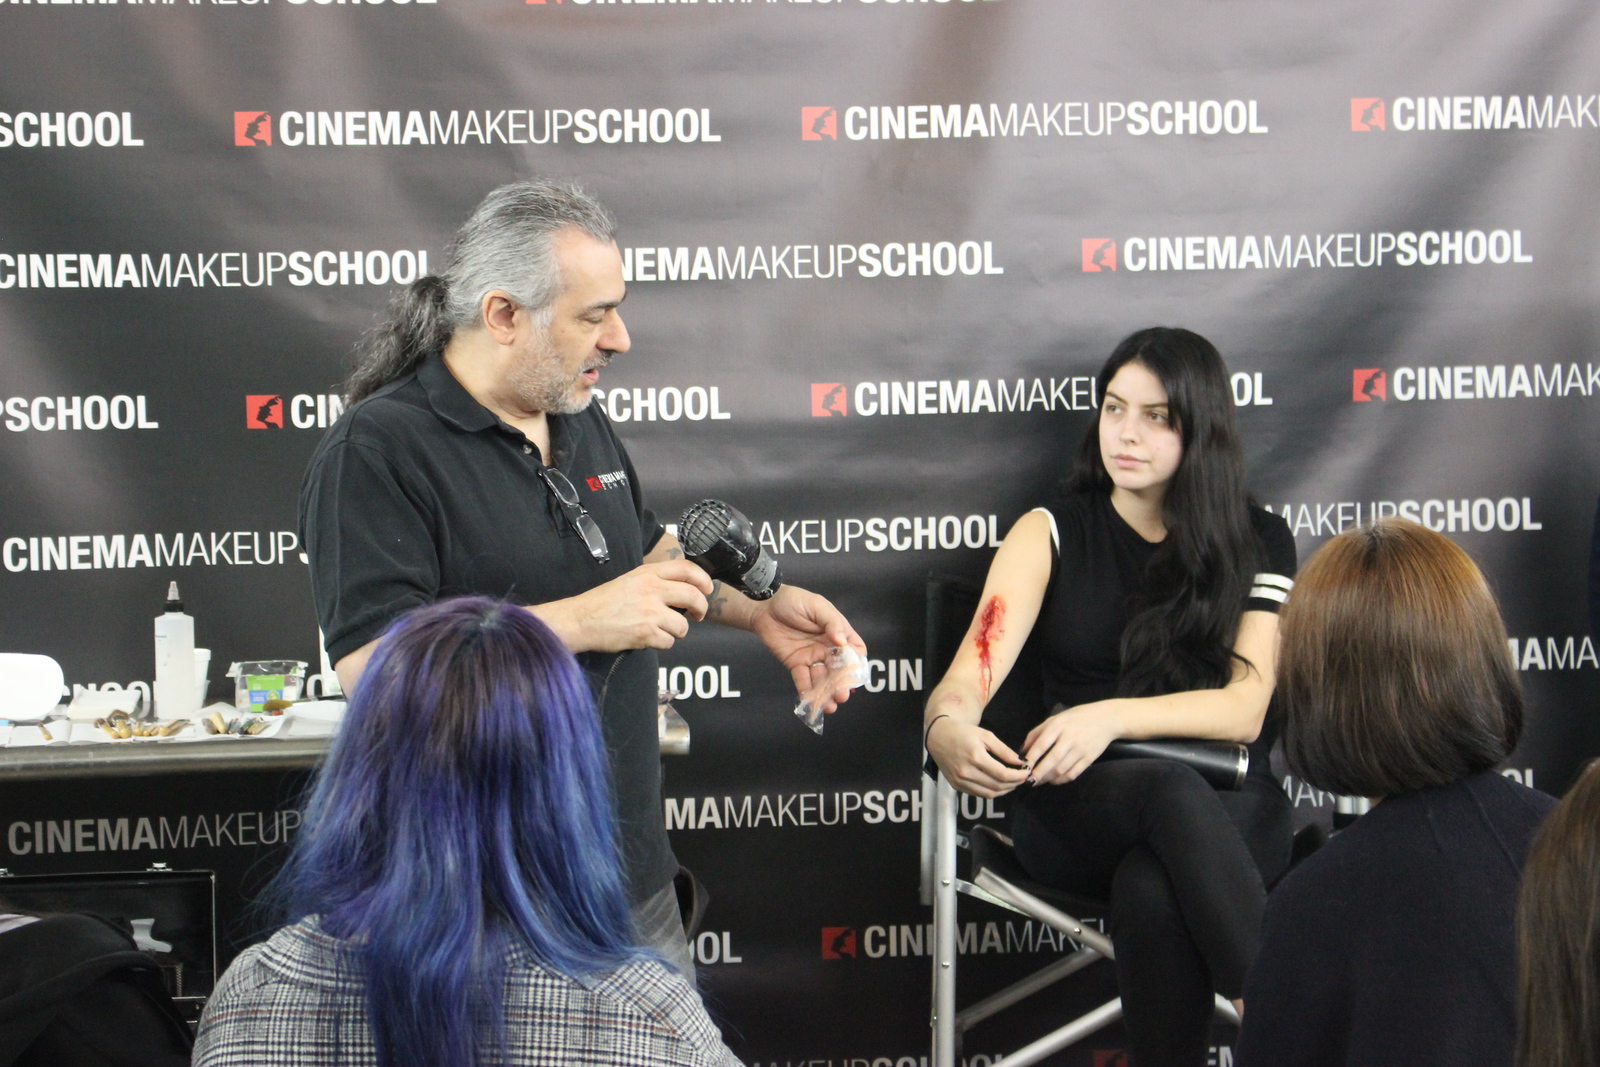
As part of the renowned Cinema Art College Corporation, Cinema Makeup School offers an immersive SFX Prosthetic Makeup Course designed to equip you with the skills and knowledge needed to master the art of special effects makeup.
In this hands-on course, you will learn the intricate techniques used to create realistic prosthetics for film, television and theater.
Through expert instruction and extensive practice, you’ll discover how to design, sculpt and apply prosthetic wounds, scars, burns and more using silicone – the industry-standard material for high-quality, flexible prosthetics.
Our experienced instructors will guide you through every step of the process, from creating molds and casts to painting and applying your prosthetic pieces for the most lifelike results.
Enroll today and start your journey to becoming an industry-leading prosthetic makeup artist!
Related Articles:
SFX vs Prosthetic Makeup: What is the Difference?
What is the Difference Between Movie and Stage Makeup?
How to Avoid Common SFX Makeup Mistakes?
By mastering the techniques of sculpting, molding, casting and applying prosthetics, you’ll be able to produce lifelike, jaw-dropping designs that captivate your audience.
Remember, practice makes perfect and attention to detail is key – each step from material selection to painting and blending will bring your creations to life.